This section provides detailed instructions for installing and managing OpsRamp Kubernetes 2.0 Agent on a Kubernetes Cluster. Follow these steps:
- Step 1: Configure Kubernetes 2.0 Integration
- Step 2: Download the YAML file
- Step 3: Install Kubernetes 2.0 Agent on Kubernetes Cluster
Step 1: Configure Kubernetes 2.0 Integration
- To select your client, navigate to All Clients, and click the Client/Partner dropdown menu.
Note: You may either type your client’s name in the search bar or select your client from the list. - Navigate to Setup > Account. The Account Details screen will appear.
- Click Integrations. The Installed Integrations screen is displayed with all the installed applications.
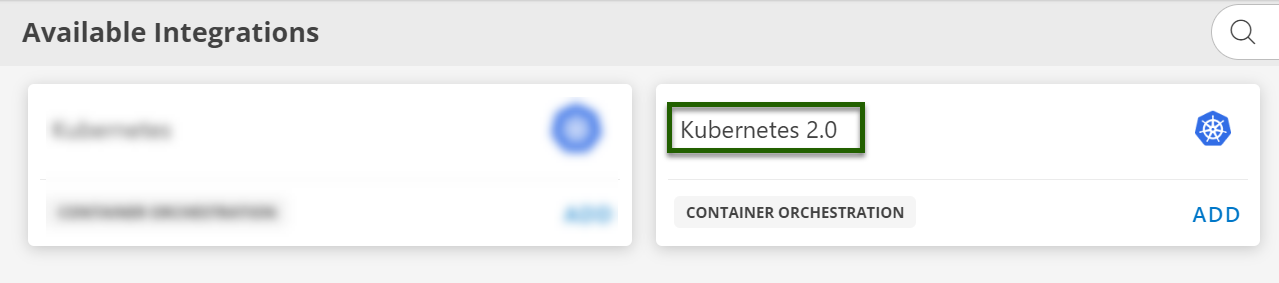
Note: If no applications are installed, you will be directed to the Available Integrations page, displaying all available applications, including the newly activated Kubernetes 2.0 integration. - Click + ADD on the Installed Integrations page.
Note: Search for the integration by entering Kubernetes 2.0 or by selecting Container Orchestration category from the All Categories dropdown list. - Click ADD in the Kubernetes 2.0 tile.
- The Configuration screen appears, click + ADD.

- Enter the following Basic Information.
| Field Name | Description | Field Type |
|---|---|---|
| Name | Enter the name for the configuration. | String |
| Distribution Type | Select the Distribution Type from following:
| Dropdown |
- Choose the required Metric based on your monitoring needs. A detailed list of available metrics for each receiver can be found here.
- Under the Additional Settings section, you can configure the following options:
- Kube-Events: Choose whether to enable or disable Kube-Events for monitoring Kubernetes event logs.
- Log: If Log Management is enabled at the client level, you will see an option to enable or disable log collection from the cluster. Enabling this will allow the platform to ingest logs for better visibility and analysis.
- Traces: If Trace Management is enabled at the client level, you will have the option to enable tracing from the cluster. Additionally, you can specify the number of tracing-proxy replica pods required to manage the tracing workload efficiently.
- Configure the Proxy Profile for Kubernetes 2.0 Agent:
- Select the appropriate Collector Profile from the dropdown menu.
- The system will automatically fill in the corresponding IP address based on your selection.
- This setup ensures that the proxy is correctly configured to support Kubernetes 2.0 operations.

- Click ADD to apply the selected settings and complete the setup.
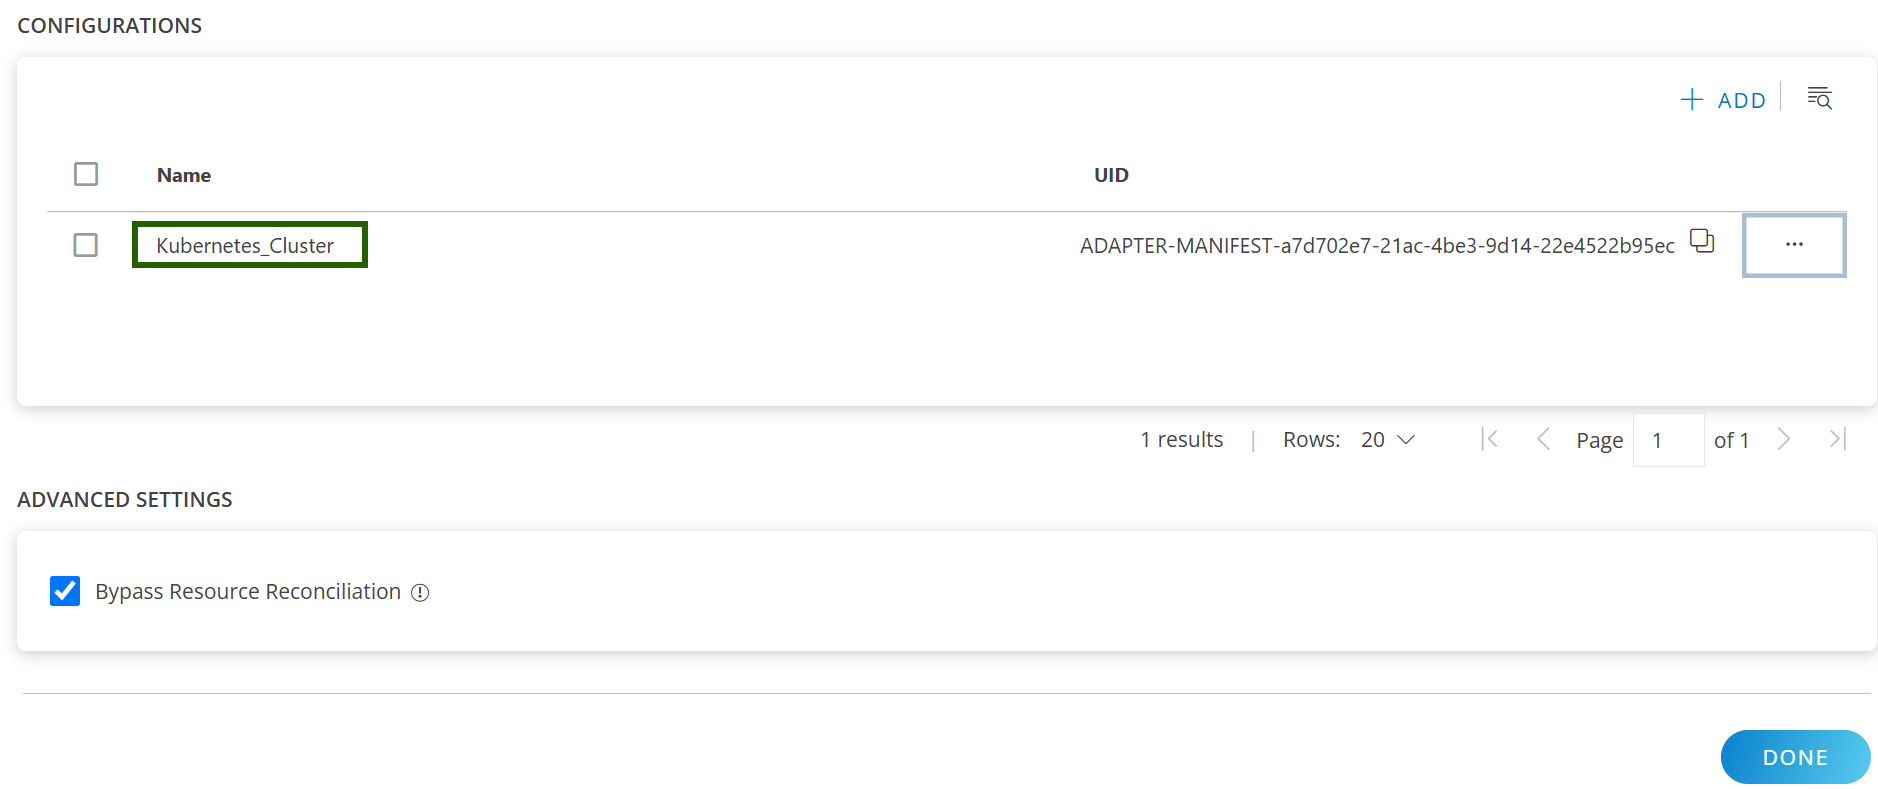
- Once the configuration is saved, it will be displayed on the configurations page.
Note
- Each configuration having one cluster. To create another cluster, click + ADD button again, as shown in the figure above.
- Bypass Resource Reconciliation: Select this checkbox to bypass resource reconciliation for resources discovered through multiple apps. multiple apps.
Manage the Configured Cluster
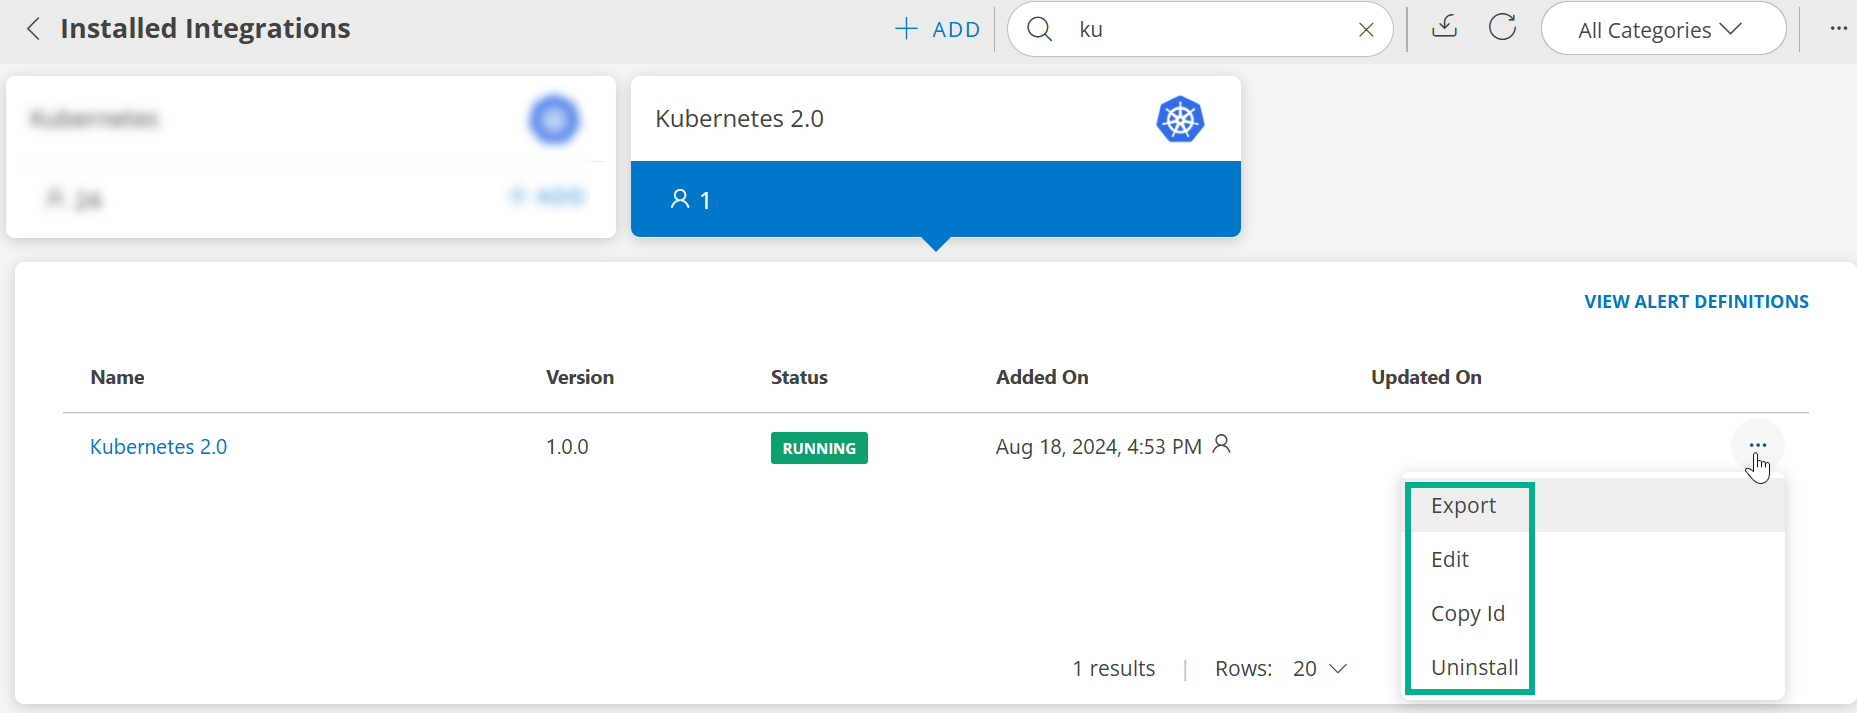
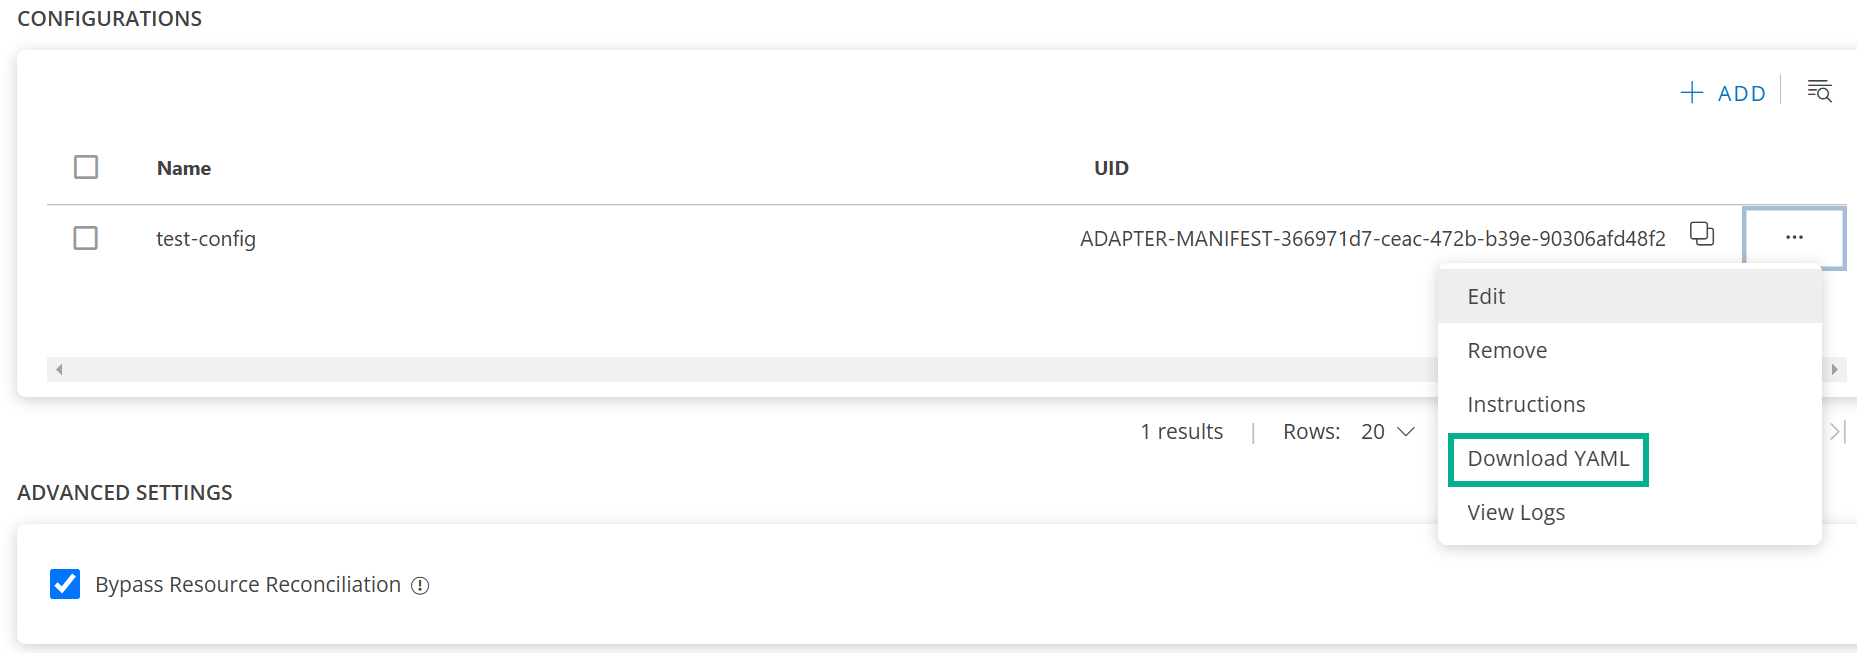
Once the configuration is created, you can manage it by clicking the ellipsis (…). The below options are available:
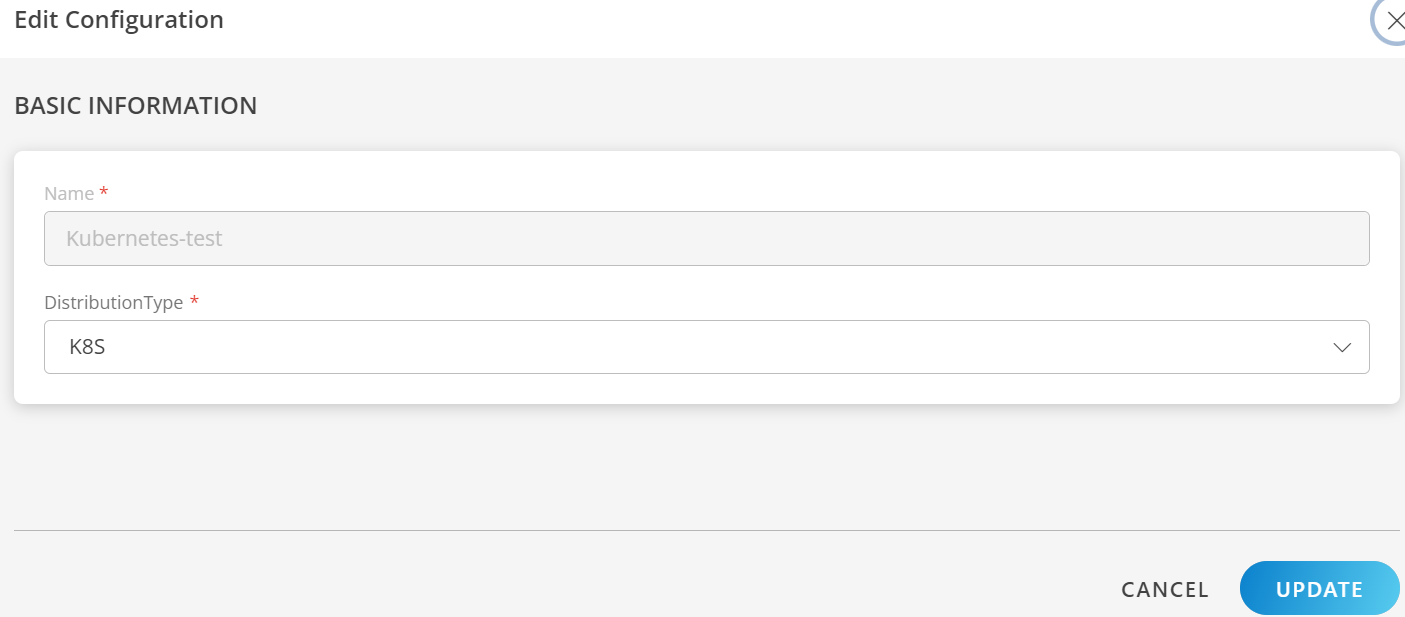
- Edit: Modify the Distribution Type and click Update.
- Remove: This will delete all resources and related metrics associated with the configuration.
- Instruction: Detailed instructions to install the OpsRamp Agent on Kubernetes cluster.
- Download YAML: Link to download the YAML file.
- View Logs: Click to view the logs details.
Manage the Kubernetes 2.0 Integration
For detailed instructions on modifying an installed integration, see the Modify an Installed Integration or Application article.
Step 2: Download and Copy the opsramp-agent-values.yaml file
Download
- Click the ellipsis (…) next to the configuration and select Download YAML.
- The YAML file will be downloaded in your local system.
- Please remember that you downloaded the YAML file location path.
Copy:
- Click the ellipsis (…) next to the configuration and select Instructions.
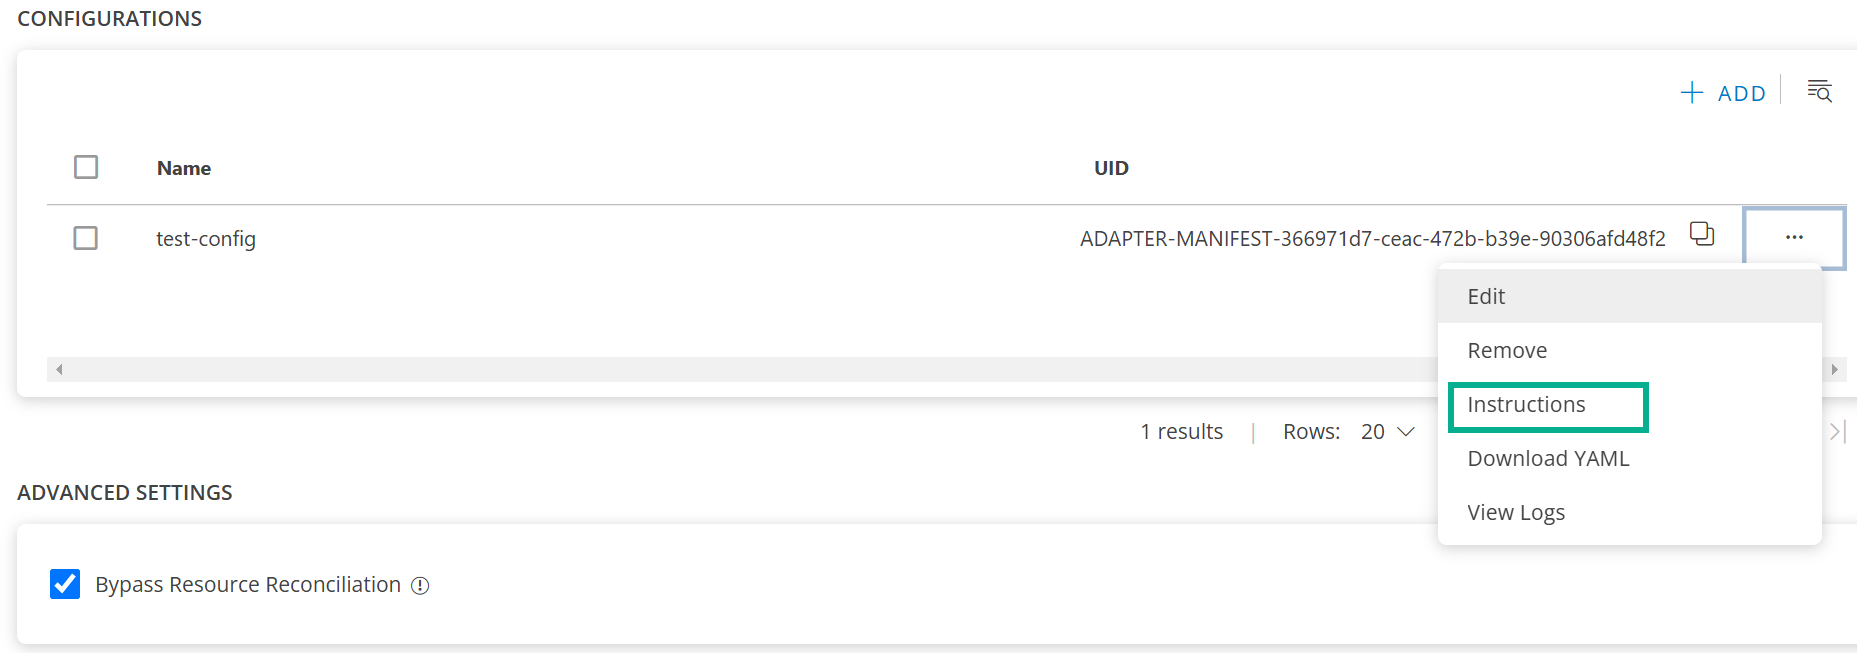
- The YAML content will be displayed on the screen.
- Click on the Copy button to copy the yaml content.
- You can store this copied content in one file, for example,
opsramp-agent-values.yaml.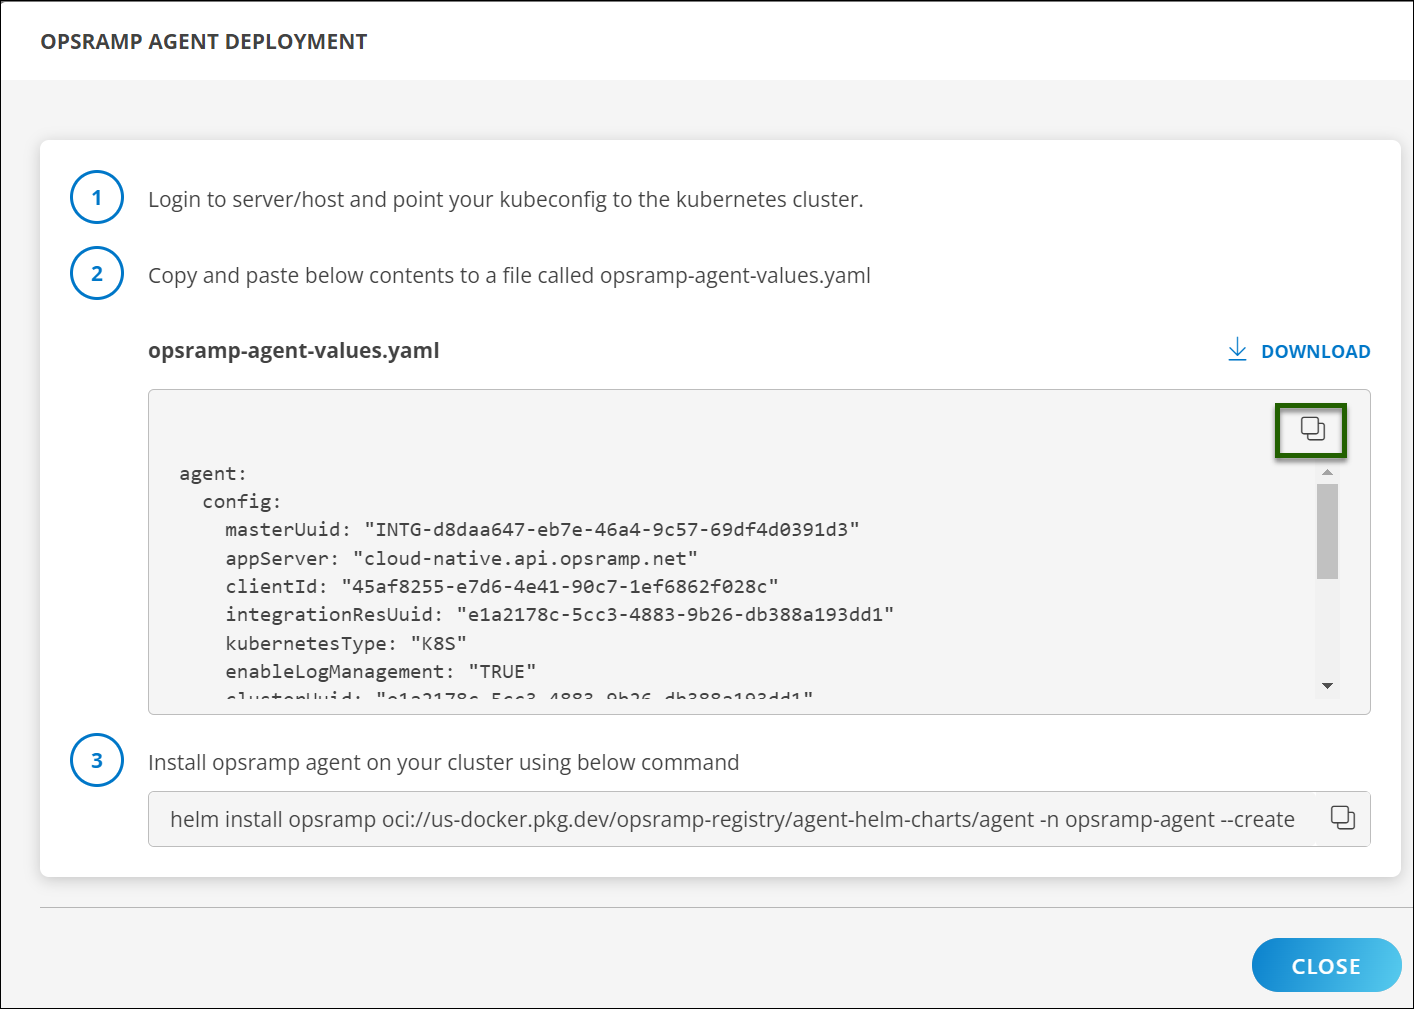
For example, the downloaded or copied file would look like the one below.
agent:
  config:
    masterUuid: "INTG-<integration UUID>"
    appServer: "OpsRamp API app server https endpoint"
    clientId: "<some client ID>"
    apiKey: "<api-key>"
    apiSecret: "<api-secret>"
    integrationResUuid: "e66995e3-5864-4807-89f9-97330f45a0d0"
    kubernetesType: "<type-of-k8s-distro>"
    enableLogManagement: "TRUE"
    clusterUuid: "<cluster-UUID>"
    clusterName: "<name-of-the-cluster-you-have-given>"
    appConfigId: "ADAPTER-MANIFEST-<app-Config-ID>"
    sdkAppName: "Kubernetes-2.0"
    metricEndpoint: "OpsRamp metric https endpoint"
    metricAuthTokenUrl: "OpsRamp Metric Auth https endpoint"
    logLevel: "warn"
    connectionType: "direct"
    proxy:
      server: ""
      port: null
      protocol: ""
      username: ""
      password: ""

metrics:
  kubeCluster:
    enabled: true
  kubeApiServer:
    enabled: true
  kubeControllerManager:
    enabled: true
  kubeScheduler:
    enabled: true
  kubeletStats:
    enabled: true
  kubeProxy:
    enabled: true
  coreDNS:
    enabled: true
  etcd:
    enabled: true

logs:
  enabled: false
  endPoint: "OpsRamp Logs https endpoint"

kubeEvents:
  enabled: true

traces:
  enabled: true

trace-proxy:
  replicaCount: 3
  config:
    OpsrampAPI: "OpsRamp https endpoint"
    AuthConfiguration:
      Endpoint: "OpsRamp auth endpoint"
      Key: "Auth Key"
      Secret: "Auth Secret"
      TenantId: "Tenant ID"
    LogsEndpoint: "OpsRamp Logs https endpoint"
    MetricsConfig:
      Enable: true
      OpsRampAPI: "OpsRamp Metrics https endpoint"
Adding a Custom Path for etcd Certificates (Optional)
If you don’t provide a path, the OpsRamp Agent will use the default certificate location for your Kubernetes setup. To use a different path, add the hostPath field to the metrics section.
metrics:
  -----
  -----
  etcd:
    enabled: true
    hostPath: "/home/path-to-custom/etcd/certs"
  ------
  ------
Step 3: Install Kubernetes 2.0 Agent on Kubernetes Cluster
- Log in to your
server/hostand ensure yourkubeconfigis pointing to the Kubernetes cluster. - Before proceeding to the next step, copy the file path you downloaded or copied in Step 2, as it will be required when running the command below.
- Now, using the file path location, run the following Helm command to install the OpsRamp Agent on the cluster.
helm install opsramp oci://us-docker.pkg.dev/opsramp-registry/agent-helm-charts/agent -n opsramp-agent --create-namespace --values <download-file-path-or-copied-file-path>.yaml