Prerequisites
- OpsRamp Classic Gateway 15.0.0 and above.
- OpsRamp Nextgen Gateway 15.0.0 and above.
Note
OpsRamp recommends using the latest Gateway version for full coverage of recent bug fixes, enhancements, and so on. - To use Bash CLI (Command Line Interface) cmdlets, the following are the prerequisites:
- SSH User (Prefer - Oracle user) must be able to execute bash commands and listener related commands (like crsctl, srvctl, and so on).
- To run SQL queries, following are the pre-requisites:
- DATABASE user should have view permissions.
- Oracle Database credentials must be same across all database names provided as comma-separated values in the configuration.
Oracle authorization permissions
We use JDBC to monitor certain metrics and support database authentication for JDBC connections.
The application uses CLI commands such as crsctl, srvctl, and olsnodes for monitoring and discovery. Instead of using .oraenv to set the Oracle environment, it configures Oracle environment variables in .bashrc.
The following screenshot shows the Oracle environment configuration defined in the .bashrc file.

Privileges- The provided database user should have the SELECT ANY TABLE> privilege.
Roles - The provided database user should have the CONNECT and SELECT_CATALOG_ROLE.
Verify the following points in gateway.
- ping <scan name> - scan hostname / scan ip address based on what is provide in the configuration. (If you are using scan hostname, ensure that the hostname is resolved by checking proper dns is configured on the gateway).
- telnet <scan name> 1521
- connect to gcli using “gcli” cmd
- execute
db oracledb <scan_name> <username> <password> <db_port> <db_name>:servicename 15000 10000 insecure Yes "SELECT INST_ID, INSTANCE_NUMBER, INSTANCE_NAME, HOST_NAME FROM gv$instance"
Note
While establishing connection on the scan hostname / IPaddress it is internally redirected to the local listeners, ensure that the end device (all RAC nodes) accepts inbound connections on all these IpAddresses.For SSH Key pair based authentication:
- Key Pair can be generated using the following command.
a. ssh-keygen -m pem
- Ensure public key is copied on to all the RAC nodes or single node in case of standalone.
a. ssh-copy-id <username>@<ip> (replace username, ip with oracle lab details)
b. We can cross-check that the public key is copied on to the end device by looking into a /root/.ssh/authorized_keys
- Once step 2 is done, user should be able to ssh to the node using private key. It should not ask for any password.
a. We can check manually from the gateway.
i. ssh -i <private-key> <username>@<ip>
If customer is using nextgen gateway, following steps need to be done.
Add hosts in coredns configmap in k3s cluster.
i. Copy coredns manifest file to custom coredns.
sudo cp /var/lib/rancher/k3s/server/manifests/coredns.yaml /var/lib/rancher/k3s/server/manifests/coredns-custom.yaml
ii. Add host entries in custom core dns file - coredns configmap.
sudo vi /var/lib/rancher/k3s/server/manifests/coredns-custom.yaml
hosts /etc/coredns/NodeHosts {
    <node1 IP> <node1 HostName>
    <node2 IP> <node2 HostName>
    ttl 60
    reload 15s
    fallthrough
}
iii. coredns in service file by adding ,coredns at the last line.
sudo vi /etc/systemd/system/k3s.service.env</pre>
iv. Kill all the k3s processes using below command.
bash k3s-killall.sh
v. Reload and restart k3s using the following commands.
sudo systemctl daemon-reload
sudo service k3s restart
If customer is using classic gateway, add the following line in /etc/hosts file.
<node1 IP> <node1 HostName><node2 IP> <node2 HostName>
Configure Oracle Cluster Integration
- To select your client, navigate to All Clients, and click the Client/Partner dropdown menu.
Note: You may either type your client’s name in the search bar or select your client from the list. - Navigate to Setup > Account. The Account Details screen is displayed.
- Click Integrations. The Installed Integrations screen is displayed with all the installed applications.
Note: If you do not have any installed applications, you will be navigated to the Available Integrations and Apps page with all the available applications along with the newly created application with the version. - Click + ADD on the Installed Integrations page.
Note: Search for the integration either by entering the name of the integration in the search bar or by selecting the category of the integration from the All Categories dropdown list. - Click ADD in the Oracle Cluster application.
- In the Configuration screen, click + ADD. The Add Configuration screen appears.
- Enter the following BASIC INFORMATION:

| Field Name | Description | Field Type |
|---|---|---|
| Name | Enter the name for the integration. | String |
| Mode | Select the type of Oracle deployment mode. Choose between RAC (Real Application Cluster) or Standalone. | String |
| Oracle Hostname/ IP Address | Enter the Oracle Hostname/ IP Address of the Oracle Cluster. It should be accessible from Gateway. Note: If the Mode is RAC scan should be provided, else Hostname/IP Address of the node should be provided. | String |
| SSH Port | Specify the SSH port for the Oracle server. Note: By default, 22 is the SSH port value. | Integer |
| Oracle SSH Credentials | Select the credential associated with your Oracle Cluster account. If you want to use the existing credentials, select them from the Select Credentials dropdown. Else, click + Add to create credentials. The ADD CREDENTIAL window is displayed. Select the credential type as Application or SSH from the drop-down list. Enter the following information:
| Dropdown |
| Database Port | Specify the port number used for database communication Note: By default 1521 is the database port value. | Integer |
| Oracle Database Credentials | Select the credential associated with your Oracle database account. If you want to use the existing credentials, select them from the Select Credentials dropdown. Else, click + Add to create credentials. The ADD CREDENTIAL window is displayed. Enter the following information.
| Dropdown |
| Database Name | Enter the names of the Oracle database instances to be monitored, separated by commas. | String |
| App Failure Notifications | When selected, you will be notified in case of an application failure such as Connectivity Exception, Authentication Exception. | Checkbox |
- CUSTOM ATTRIBUTES: Custom attributes are the user-defined data fields or properties that can be added to the preexisting attributes to configure the integration.
| Field Name | Description | Field Type |
|---|---|---|
| Custom Attribute | Select the custom attribute from the dropdown. You can add attributes by clicking the Add icon (+). | Dropdown |
| Value | Select the value from the dropdown. | Dropdown |
Note: The custom attribute that you add here will be assigned to all the resources that are created by the integration. You can add a maximum of five custom attributes (key and value pair).
- In the RESOURCE TYPE section, select:
- ALL: All the existing and future resources will be discovered.
- SELECT: You can select one or multiple resources to be discovered.
- In the DISCOVERY SCHEDULE section, select recurrence pattern to add one of the following patterns:
- Minutes
- Hourly
- Daily
- Weekly
- Monthly
- Click ADD.

Note
Sample values shown in the configuration fields are for illustration purposes only. Use your actual integration details when configuring.Now the configuration is saved and displayed on the configurations page after you save it.Note: From the same page, you may Edit and Remove the created configuration.
12. Under the ADVANCED SETTINGS, Select the Bypass Resource Reconciliation option, if you wish to bypass resource reconciliation when encountering the same resources discovered by multiple applications.
Note: If two different applications provide identical discovery attributes, two separate resources will be generated with those respective attributes from the individual discoveries.
13. Click NEXT.
14. (Optional) Click +ADD to create a new collector. You can either use the pre-populated name or give the name to your collector.
15. Select an existing registered profile.
- Click FINISH.
The integration is installed and displayed on the INSTALLED INTEGRATION page. Use the search field to find the installed integration.
Modify Oracle Cluster Integration
See Modify an Installed Integration or Application article.
Note: Select Oracle Cluster.
Discover Resources in Oracle Cluster Integration
- Navigate to Infrastructure > Search > DATABASES > Oracle Cluster. The Oracle Cluster page is displayed.
- Select the application on the Oracle Cluster page
- The RESOURCE page appears from the right.
- Click the ellipsis (…) on the top right and select View Details.
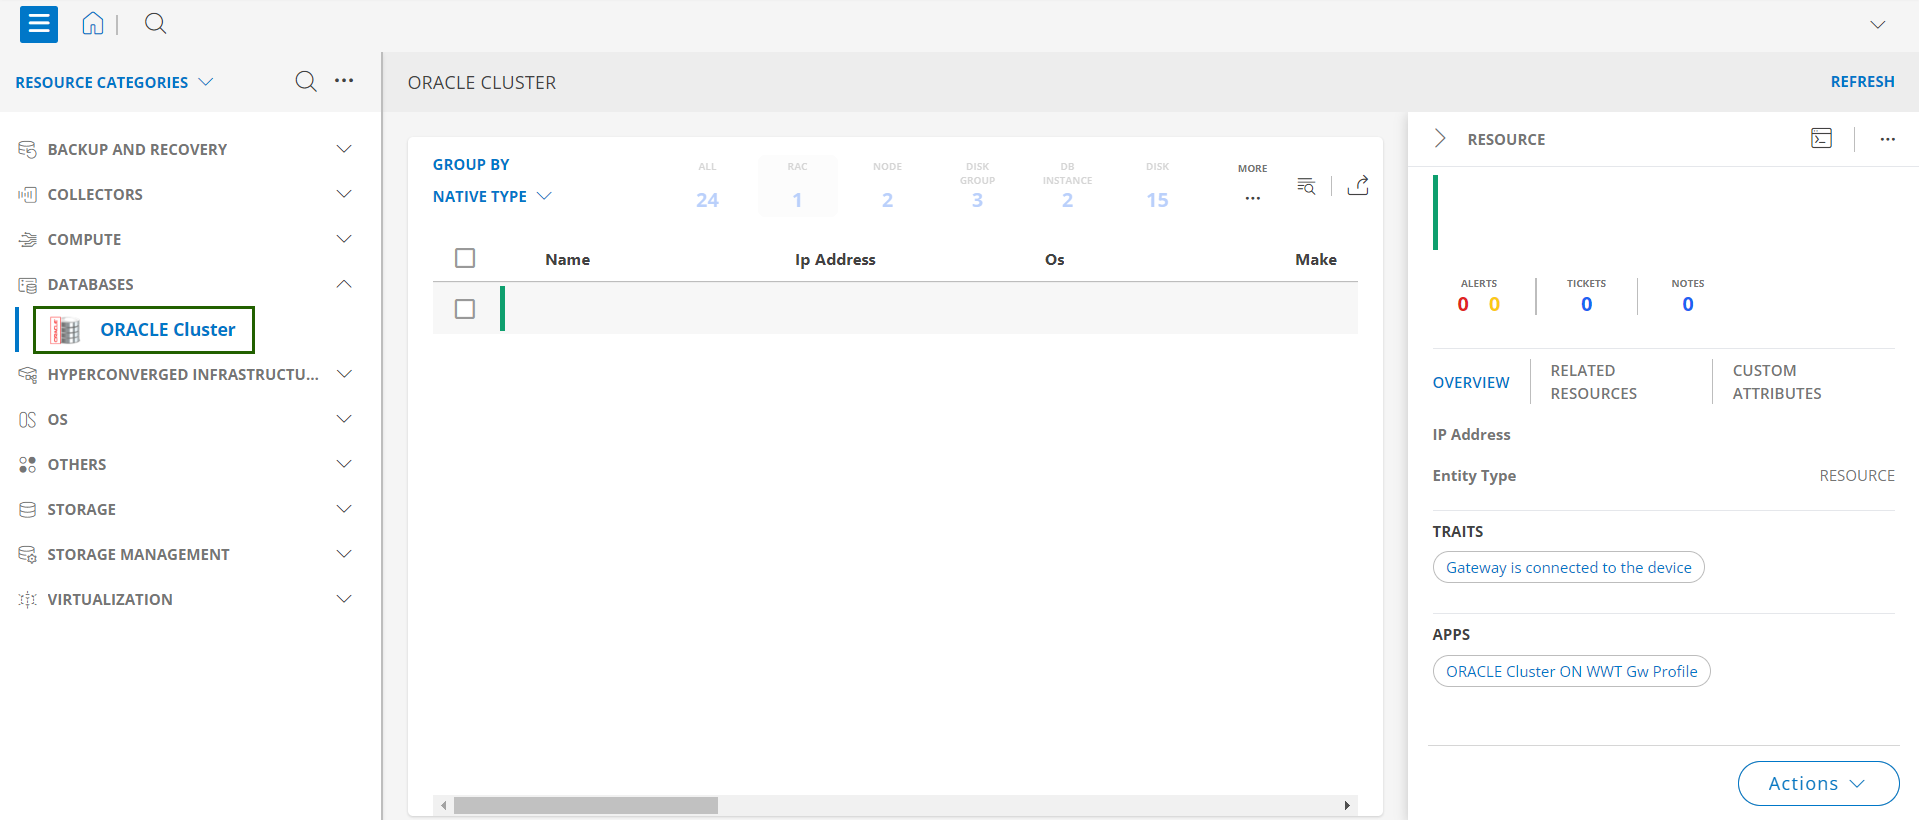
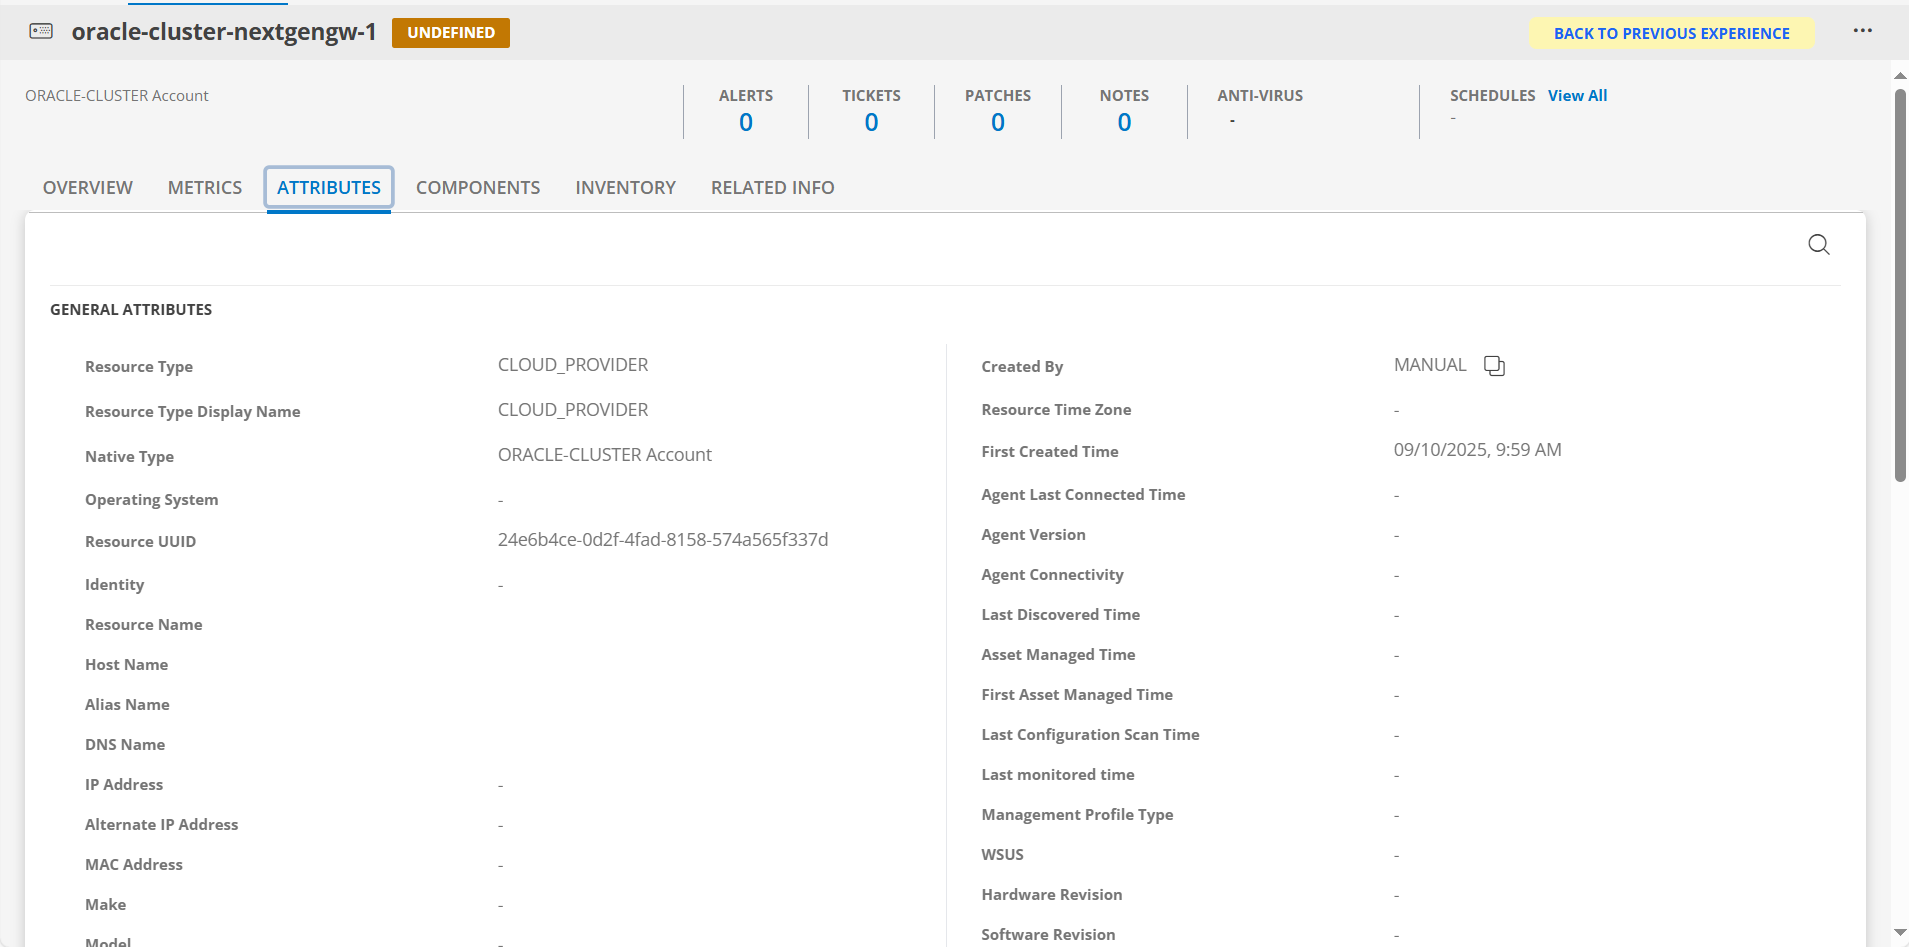
- Navigate to the Attributes tab to view the discovery details.
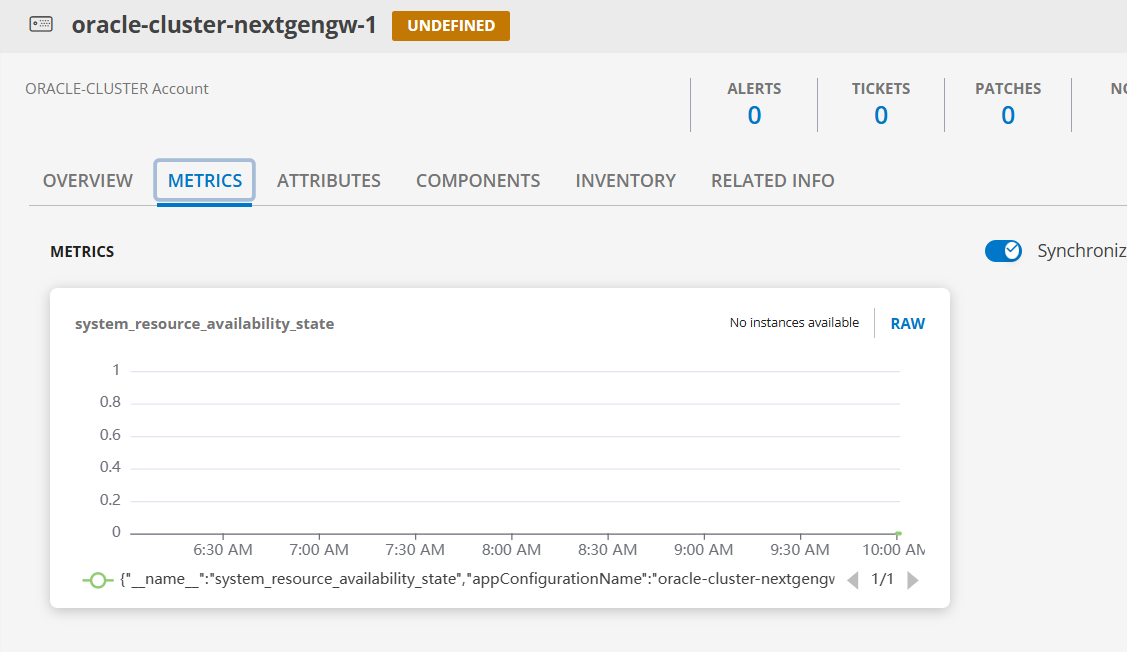
View resource metrics
To confirm Oracle Cluster Cluster monitoring, review the following:
- Metric graphs: A graph is plotted for each metric that is enabled in the configuration.
- Alerts: Alerts are generated for metrics that are configured as defined for integration.
- Click the Metrics tab to view the metric details for Oracle Cluster.